A Step Beyond Rapid Prototyping
As we look back the many manufacturing projects from last year and prepare to launch programs and services for 2017, our thoughts came back to one specific project, with good reason.
More than any other year, 2016 showcased the flexibility and adaptability of our engineering and manufacturing departments. Last April, we presented a case study about an OEM with a trauma product whose deadline seemed unachievable. Ultimately, having the experience and quality control systems established, we were able to deliver a finished product ready for cadaver lab review and validation testing in just a few weeks.
December 2016 our OEM successfully launched this product on-time, however, it was not without a few interesting and unexpected turn of events.
Product Detail Reap: Large joint product with 20 Sizes within one family of products
The Challenge: Validate without the necessary Custom Air Gauge Tool (exclusive to OEMs geometry)
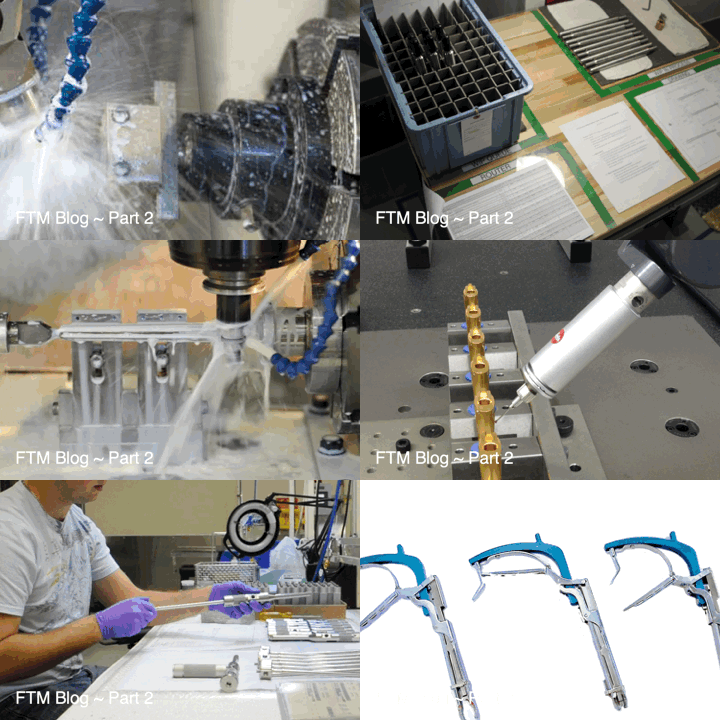
Using air gauging to check the tolerances on the tapered ends, is standard operating procedure. Air gaging offers magnification and reliability to measure small tolerances. Unfortunately, our OEMs custom tool manufacturer delivered a defective product. We knew immediately, other options needed to be considered in order to meet the required deadline. A custom air gauge tool can take up 16 weeks to be created. 16 additional weeks we did not have for device testing. Relying on experience and a great team, PPM came up with an alternate solution.
Proposed Solution:
Our team considered everything. In the end, it was our know-how and experience machining titanium parts that made the right solution possible. In lieu of having the custom air gauge physically on the manufacturing floor facilitating and streamlining the inspection process, our engineering and quality teams determined that we could accomplish the same goals by taking advantage of existing in-house resources in a new way. To that end, they developed a unique process that included additional routes through inspection and the manufacturing floor. The additional back and forth transportation of the parts to and from QA and QC increased inspection timetables, but the creativity behind the unique AQL set-ups and new protocols for a number of parts to be inspected at one time was highly effective.
Success!
It was this special inspection process that made the launch possible. December this year we delivered the second reorder of parts, once again using the same unique inspection process developed especially for their product. Our OEM customer said they couldn’t have been more pleased!
This kind of out-of-the-box thinking, together with years of experience has produced many success stories for our OEMs. Their success validates our mission to further develop a manufacturing environment that delivers the type of flexibility and adaptability our OEMs need and that allows us to become a natural extension their business. We look forward to continuing this mission in the coming year.

Get Social